
In this article, you will learn how to add JUnit 5 to a project for running tests in one or more threads.
Note that to use JUnit, you need to have Java, Maven, and IntellijIDEA installed on your PC. You can find links to the installation videos in the playlist.
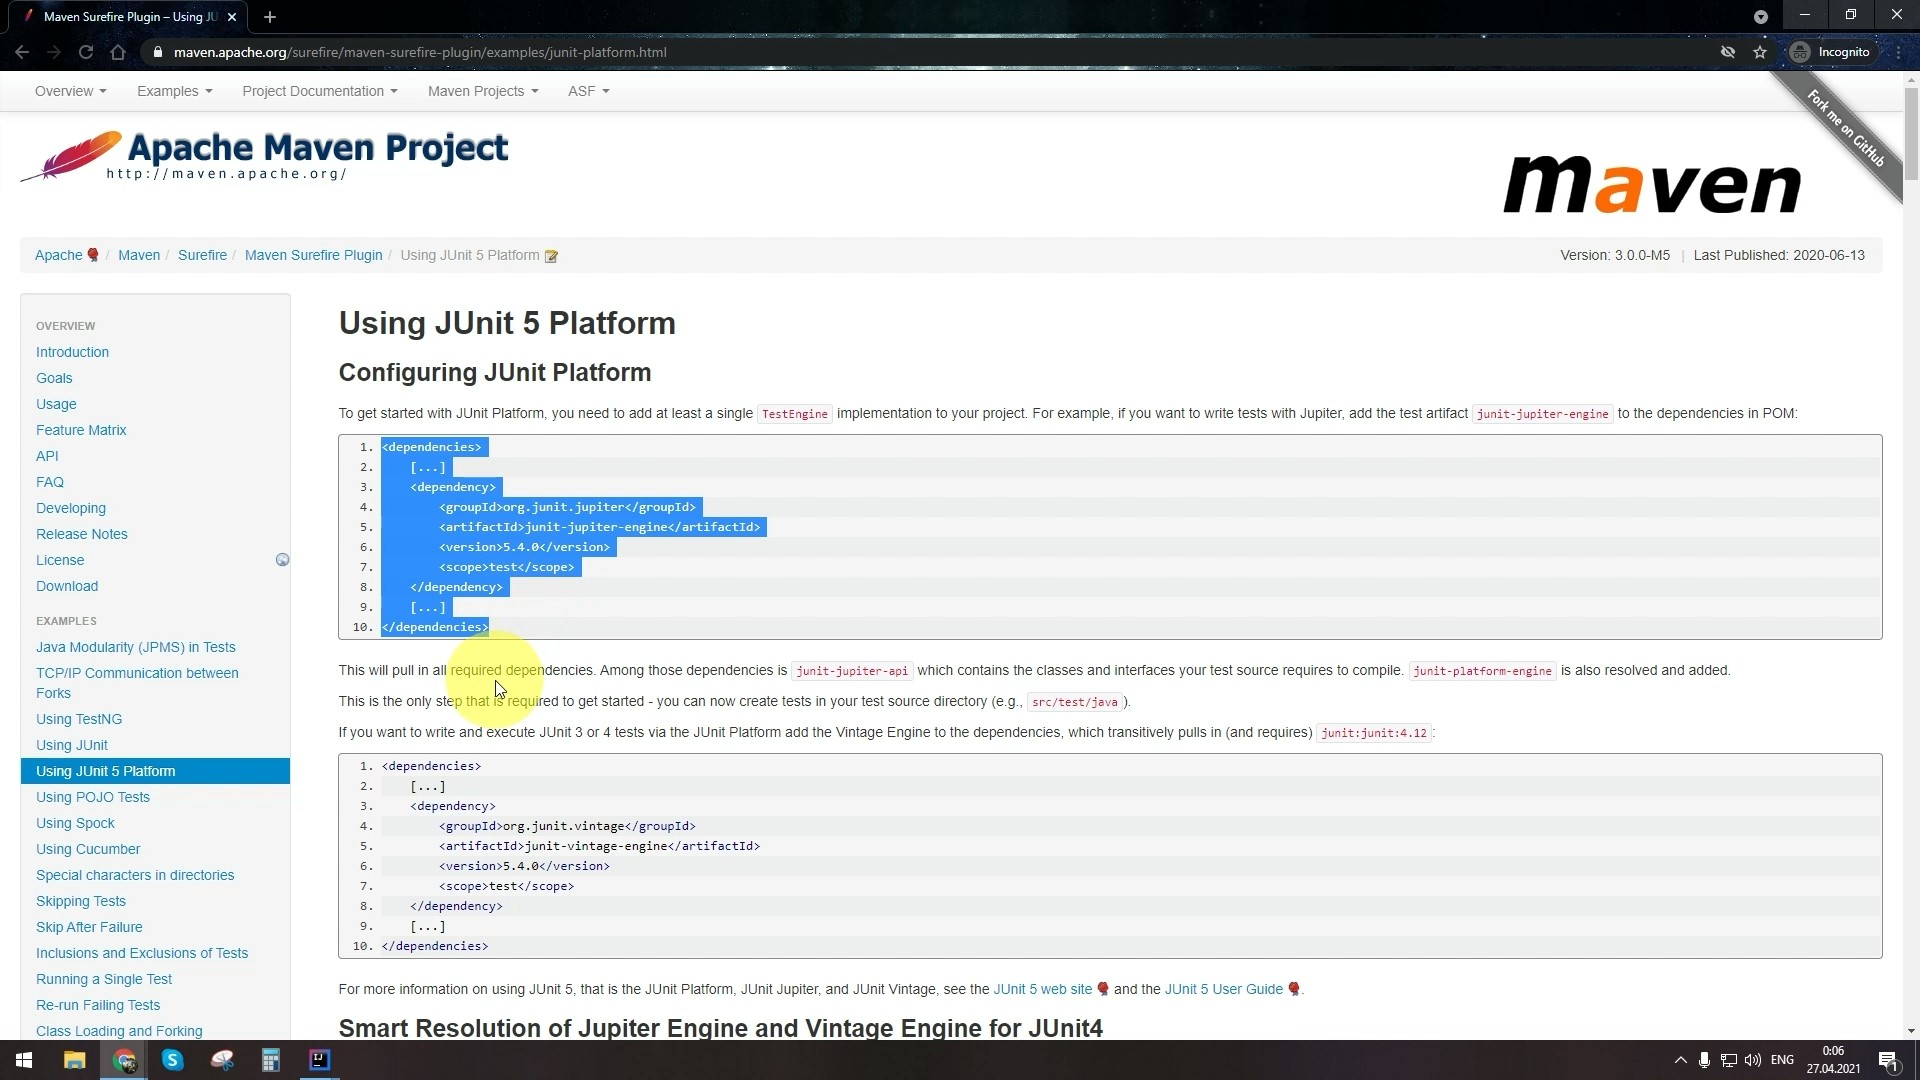
- Open the link to Maven’s official website.
- You will see a page titled Using JUnit 5 Platform.
- Copy the code from the first block.
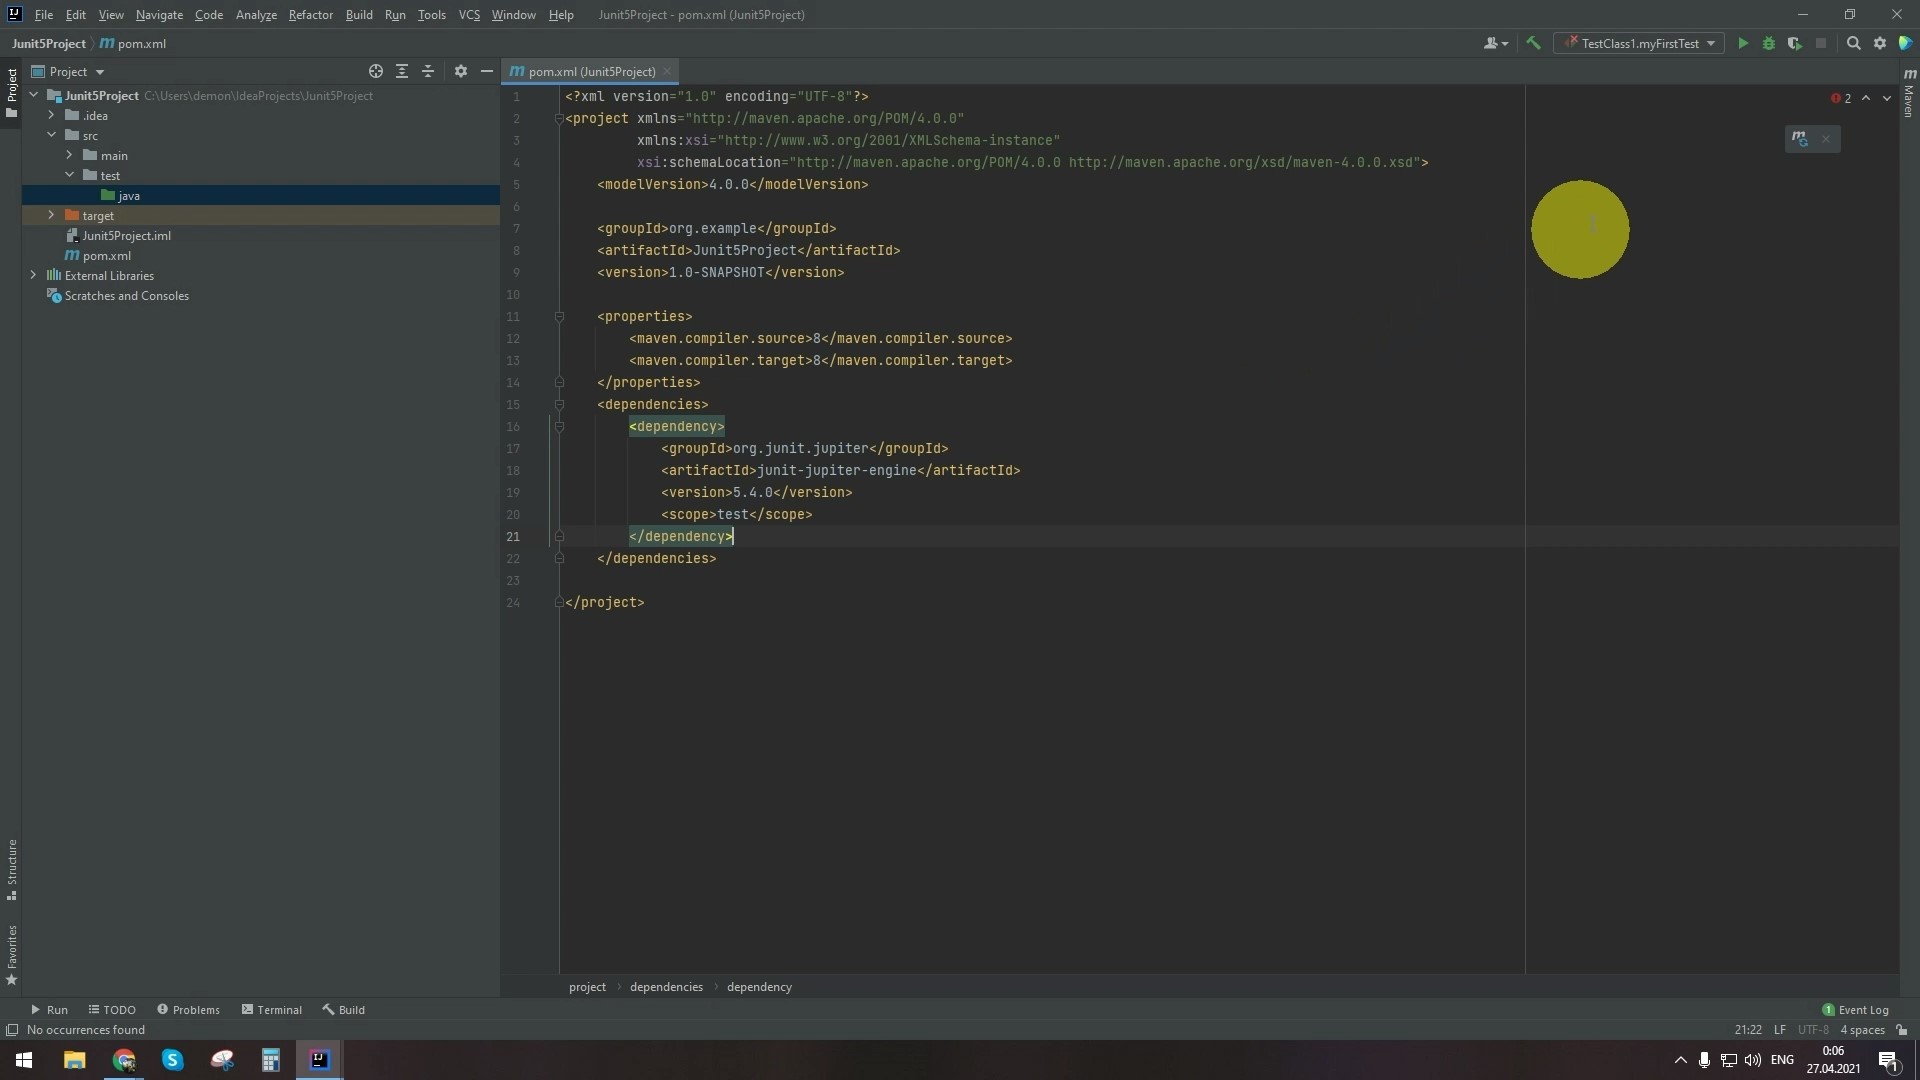
- Open IntellijIDEA with a pre-created and launched Maven project. You can learn how to do it in one of our previous videos.
- Open the pom.xml file.
- Paste the copied code inside the <project> tag and delete the blocks with dots in square brackets.
- Click the Load Maven Changes button at the top right of the screen and wait until the update is completed.
- Now, let’s try to create a little test.
- Go to the src > test folder.
- Right-click on the java folder. Select Java Class under New in the menu.
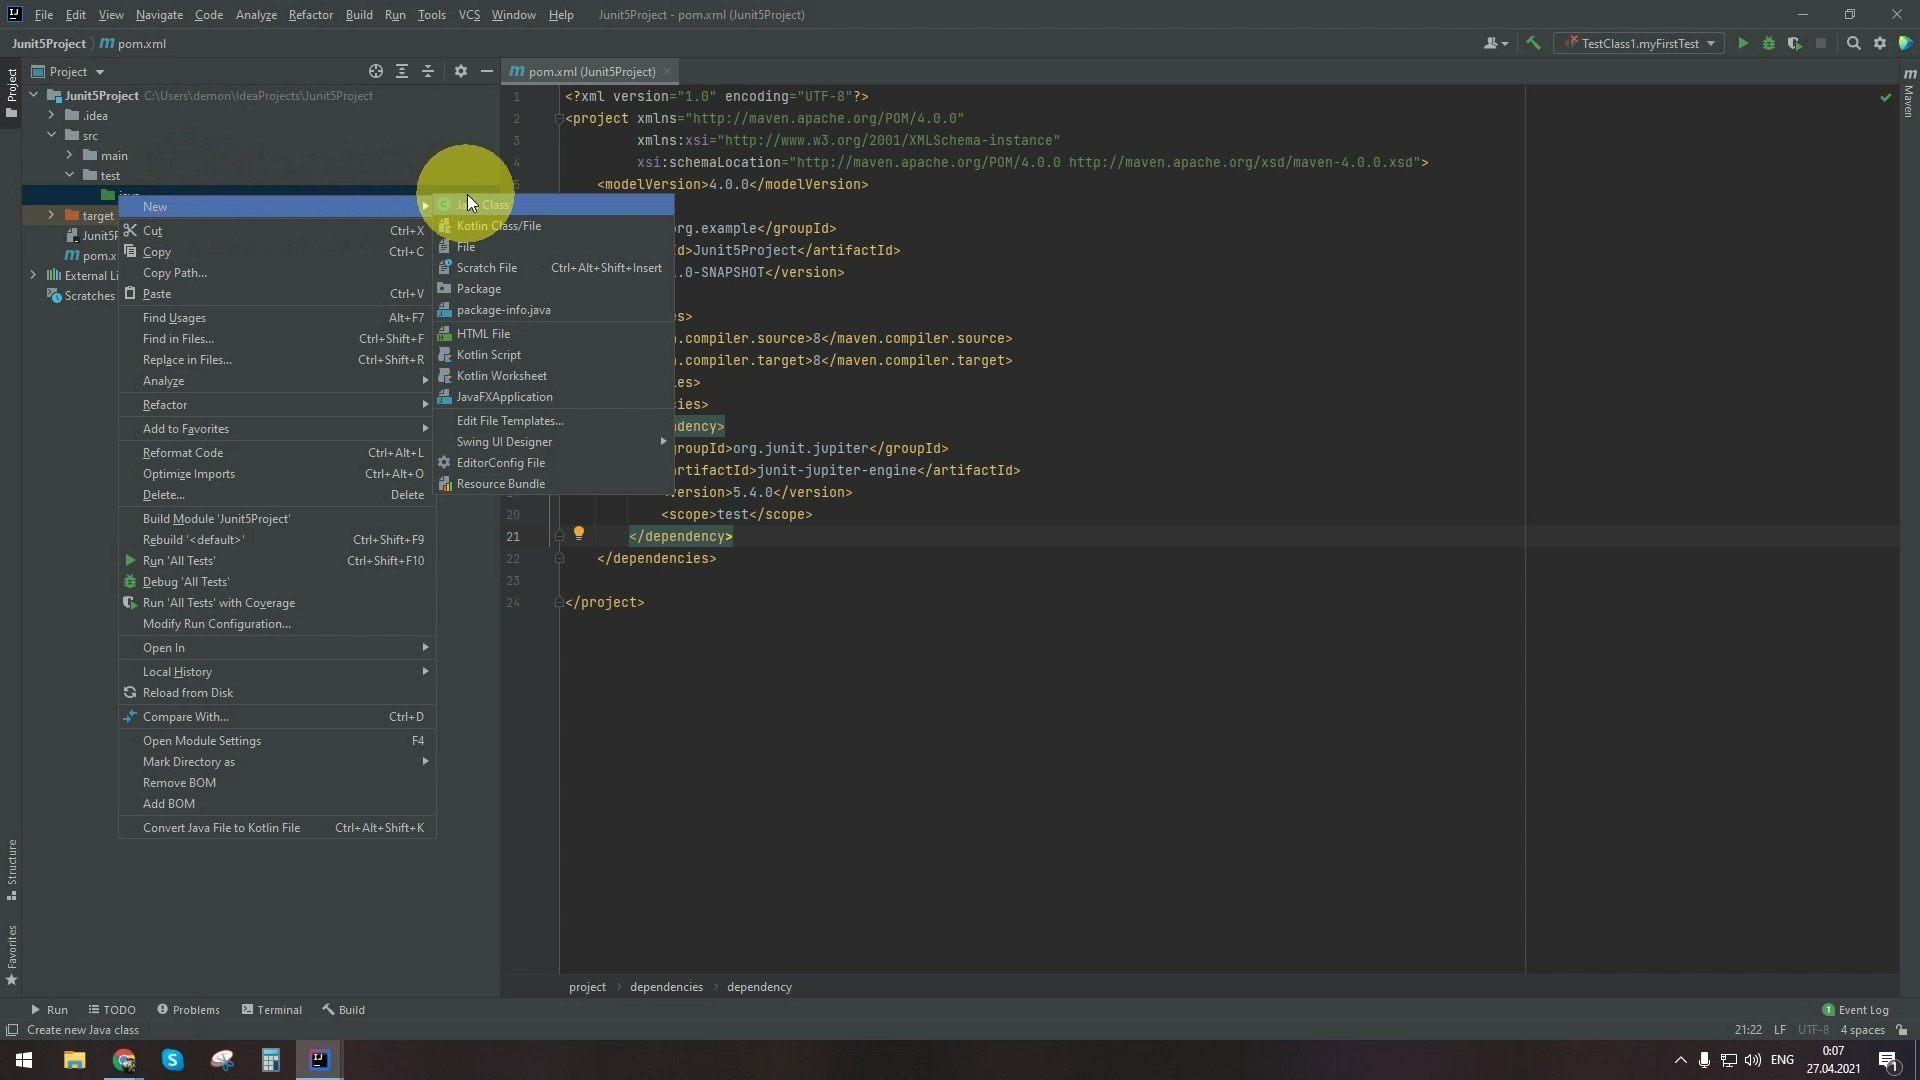
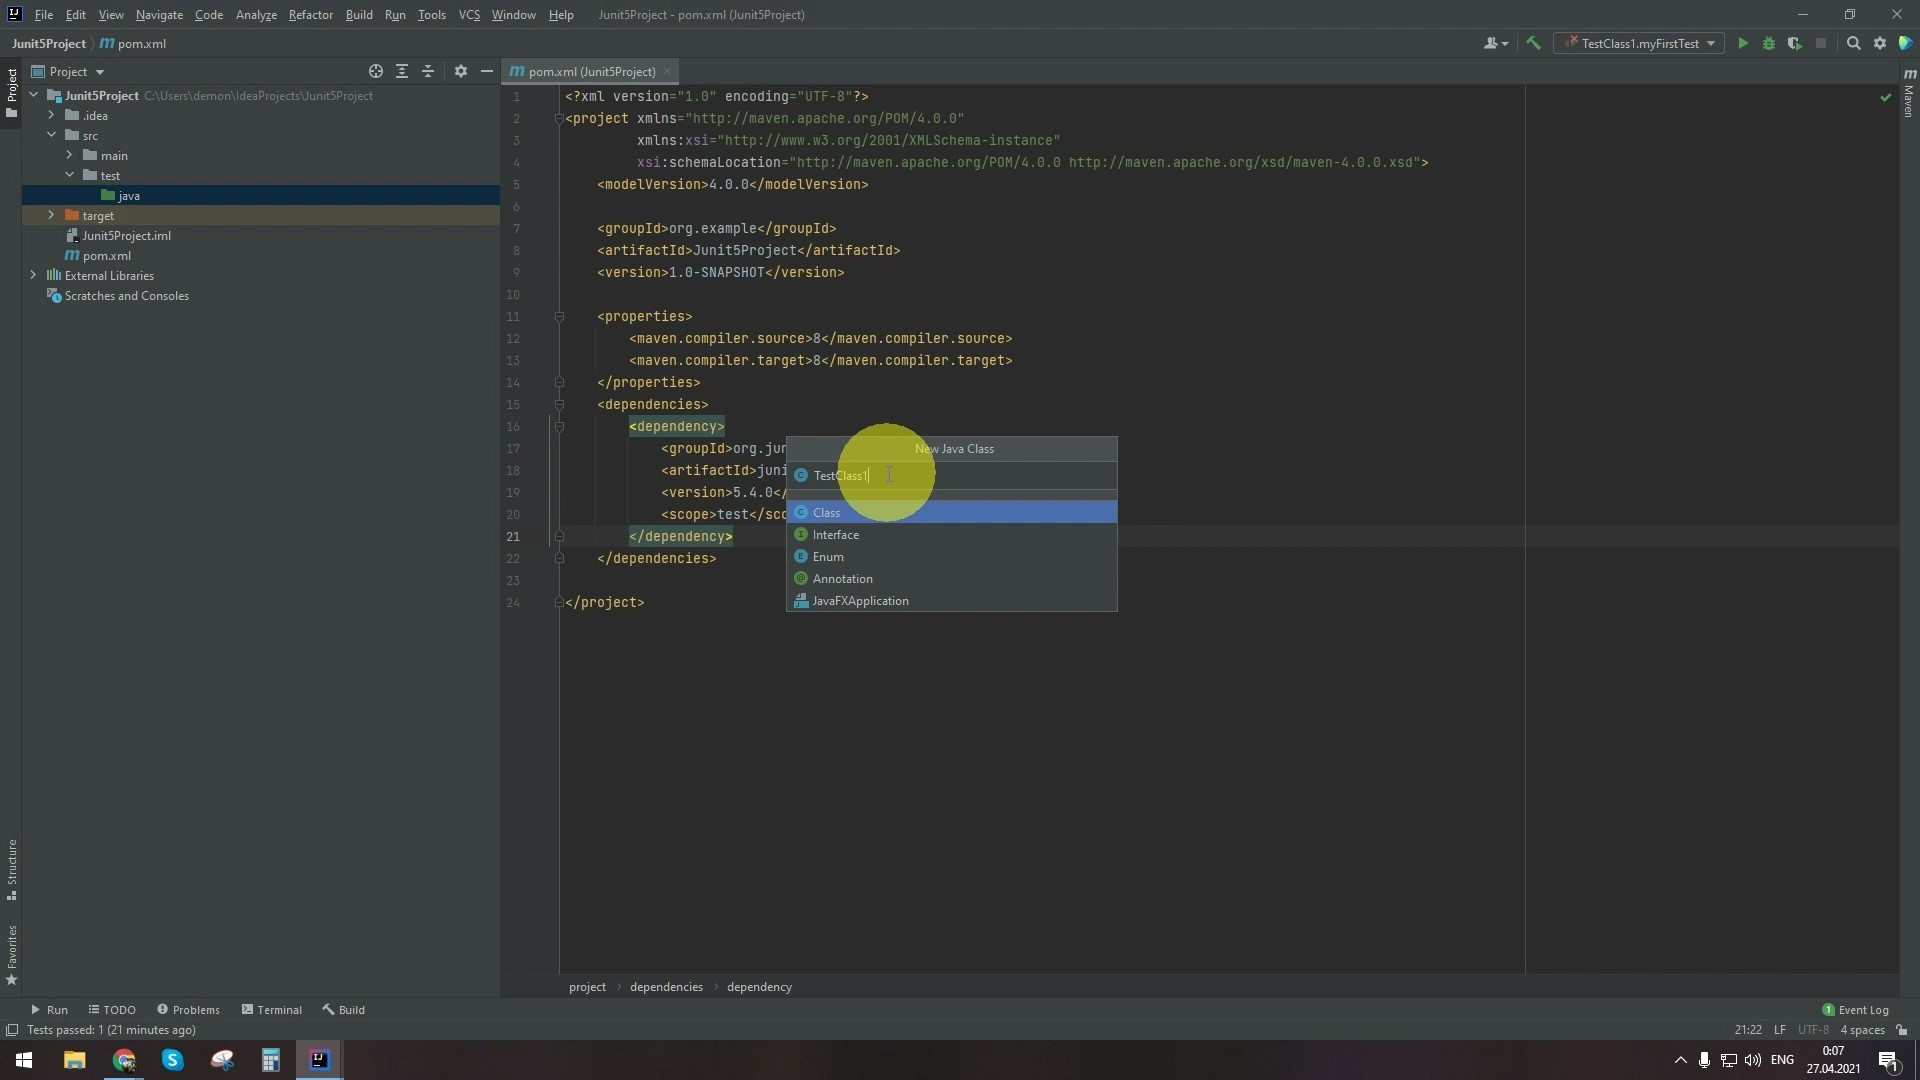
- Name the class. For example, TestClass1. There should be no spaces in class names.
- Press Enter. The class file will open automatically.
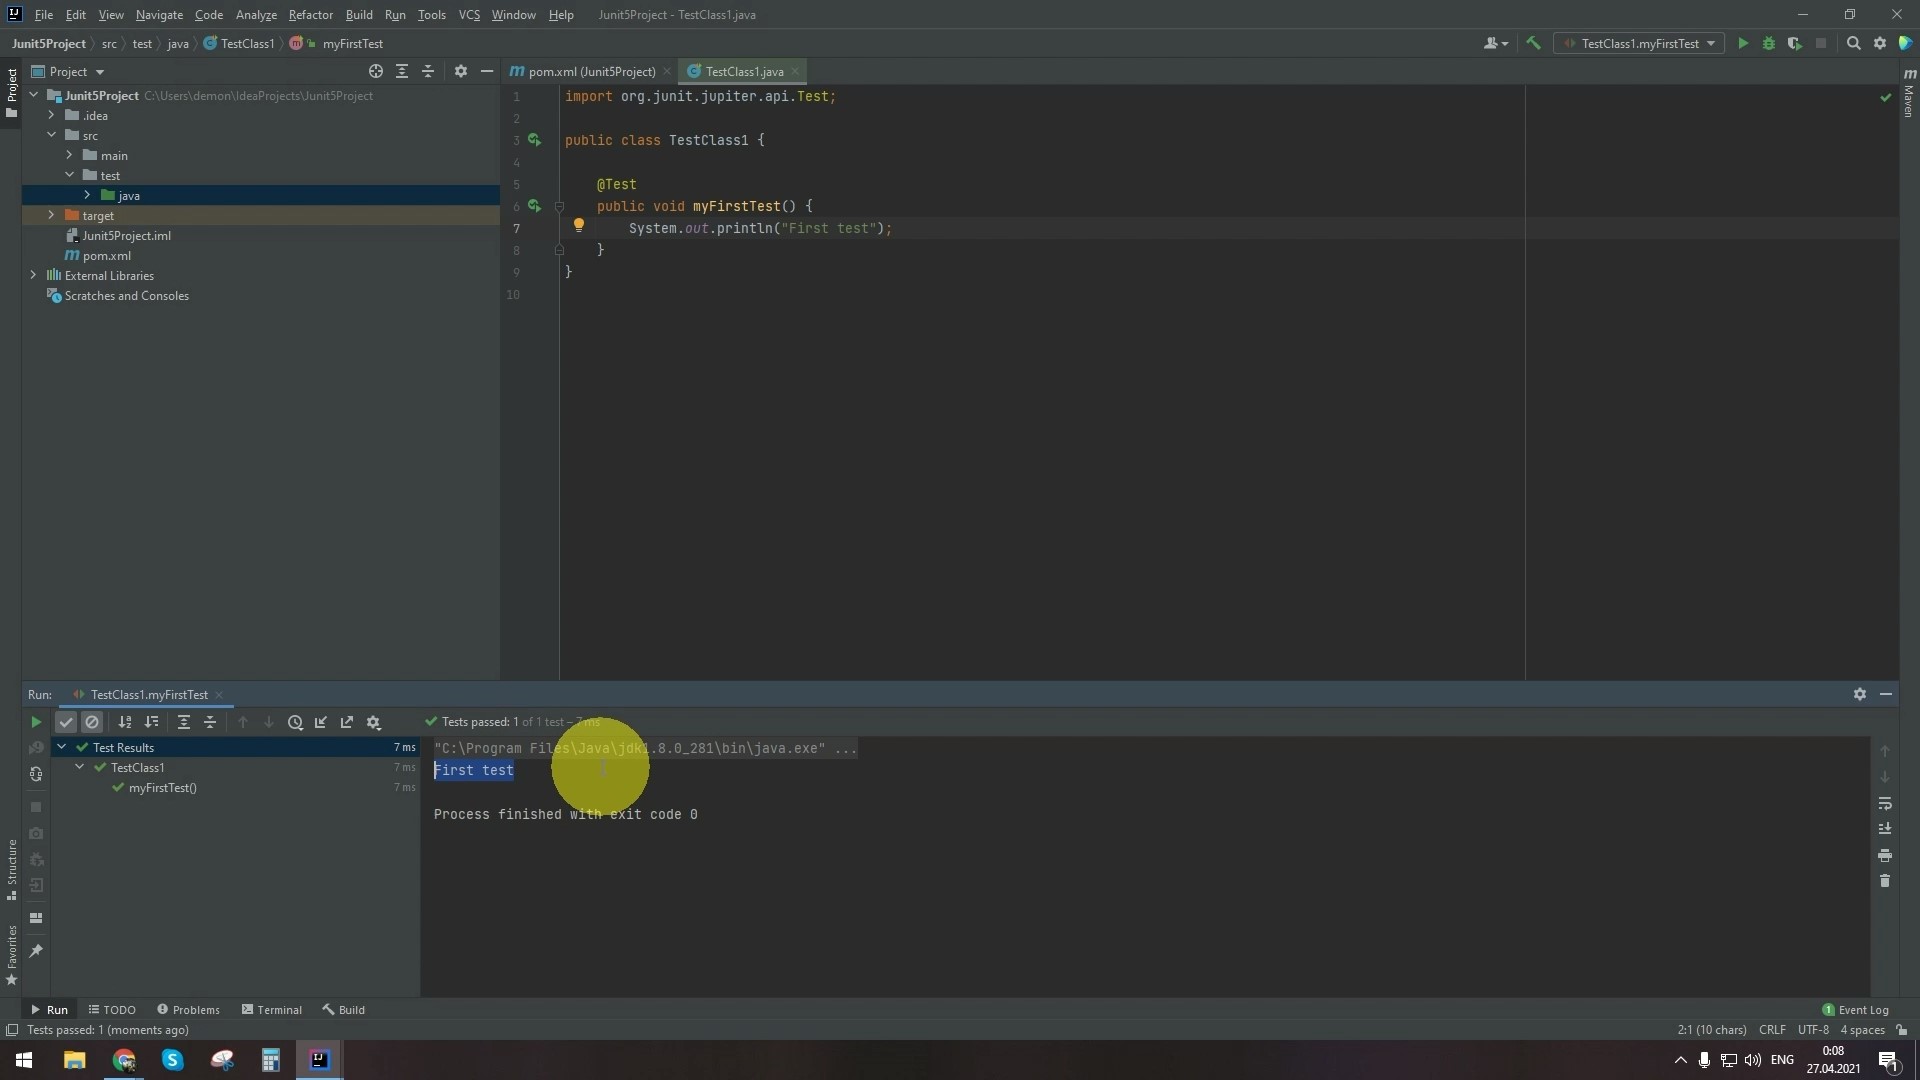
- Inside the class, create a method to be your test. To turn it into a test, add the Test annotation above it.
- To see if the test works, add a simple output to the console inside it. For example, type the words first test.
- There are two ways to run a test.
- You can press the green button and select Run.
- Do this and look at the result.
- The sentence you have entered in the test is displayed in the console.
- The other way will take a little more time. Open a terminal. You can use an IntellijIDEA or a default Windows terminal.
- Type mvn clean test into the terminal and press Enter.
- As you can see, the test did not start.
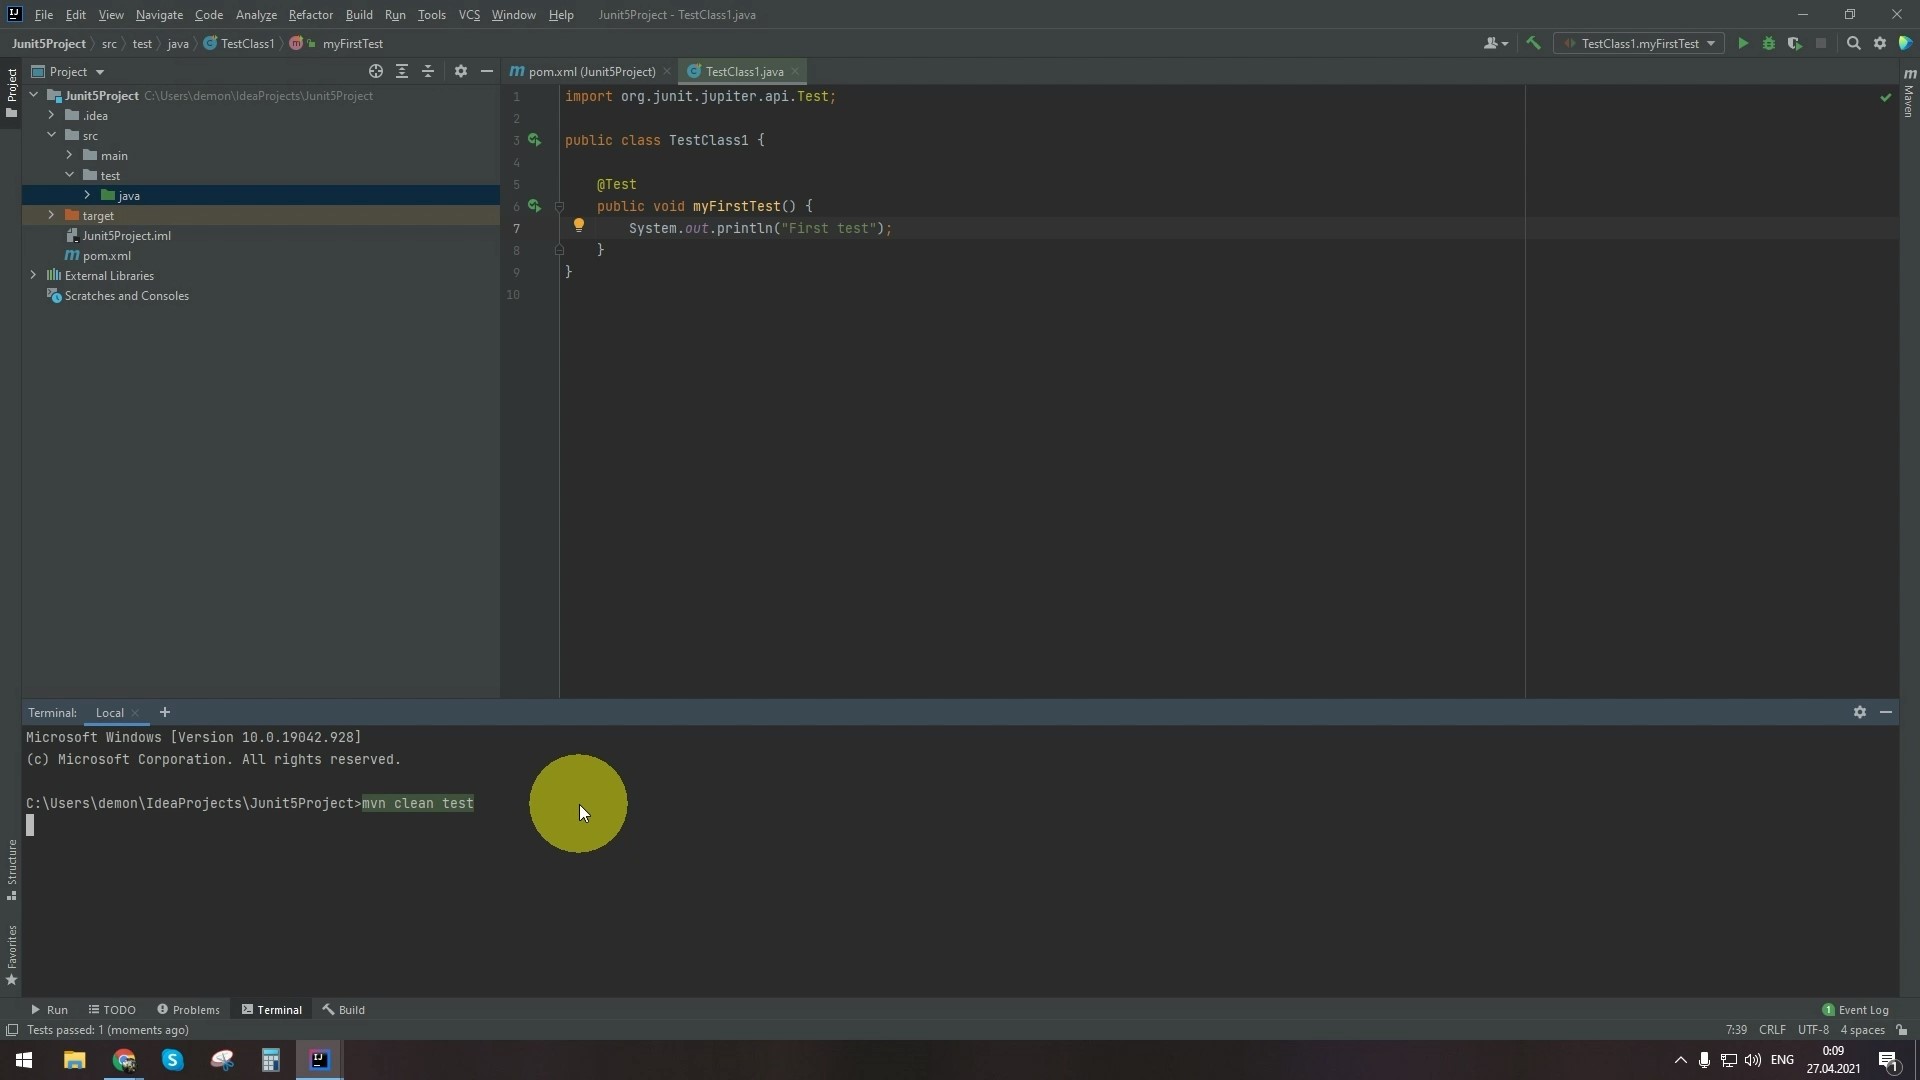
- To fix this, you need to add the maven-surefire-plugin to the project.
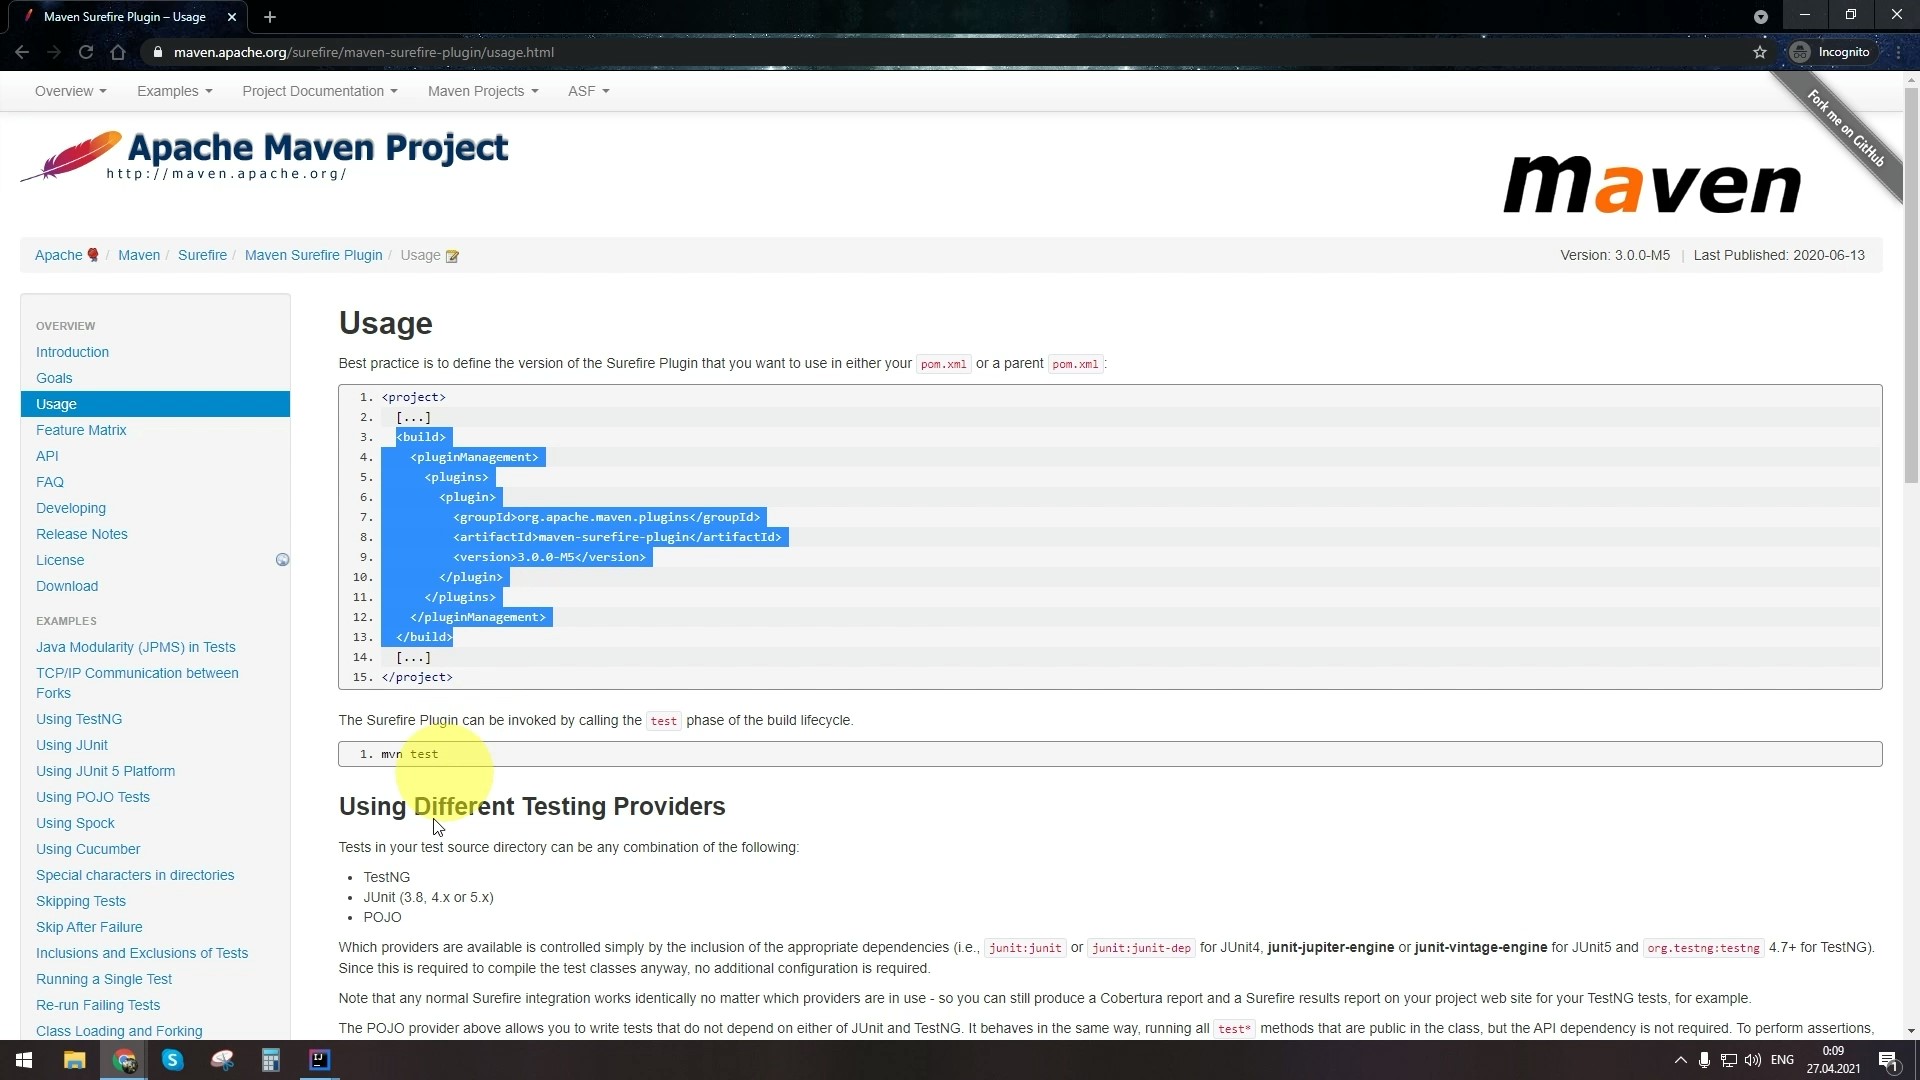
- Go back to the Apache Maven Project you have recently visited to copy the code.
- Select Usage on the menu.
- Copy everything under the
tag in the first block of code, including the tag.
- Open the pom.xml file.
- Paste the copied code inside the
tag. - Click on Load Maven Changes at the top right of the screen. Wait for the update to finish.
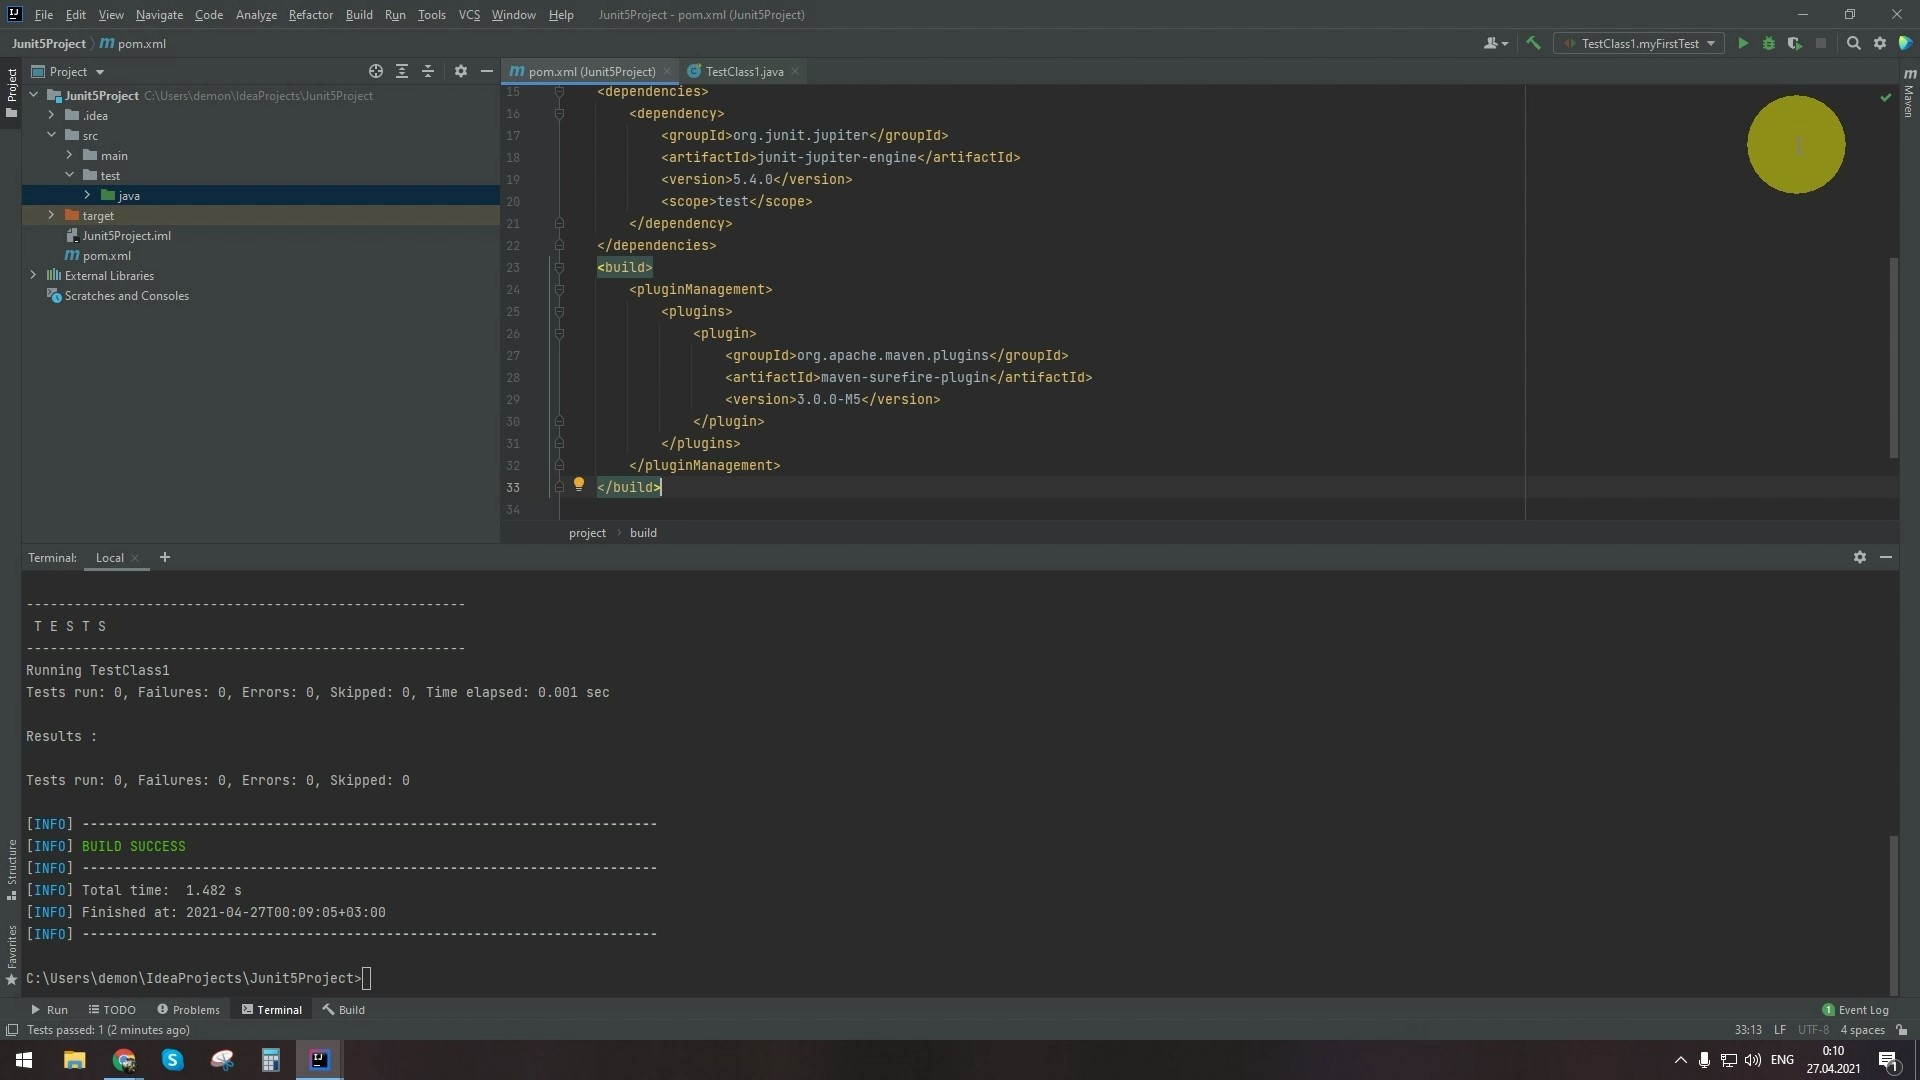
- Open a terminal, type mvn clean test, and press Enter.
- As you can see, the test was successful, and the test message was displayed in the terminal.

- Add one more similar test, but with a different name and a different message.
- Run the tests using the same command in the terminal to see if both are successful.
- Now, let’s imagine that each of the tests has some common steps to complete before and after it. We do not want to repeat the code over and over again. In addition to affecting its readability, repetitions make the code more difficult to support.
- Fortunately, JUnit5 has several tools to handle this, such as annotations BeforeAll, AfterAll, BeforeEach, and AfterEach.
- Let’s add them to our class and look at the effect.
- Note that methods with BeforeAll and AfterAll annotations should always be static, while BeforeEach and AfterEach should not be static.
- We added the className variable only to illustrate better the sequence of tests run from different classes. Each of them simply displays the text with some punctuation for visual convenience.
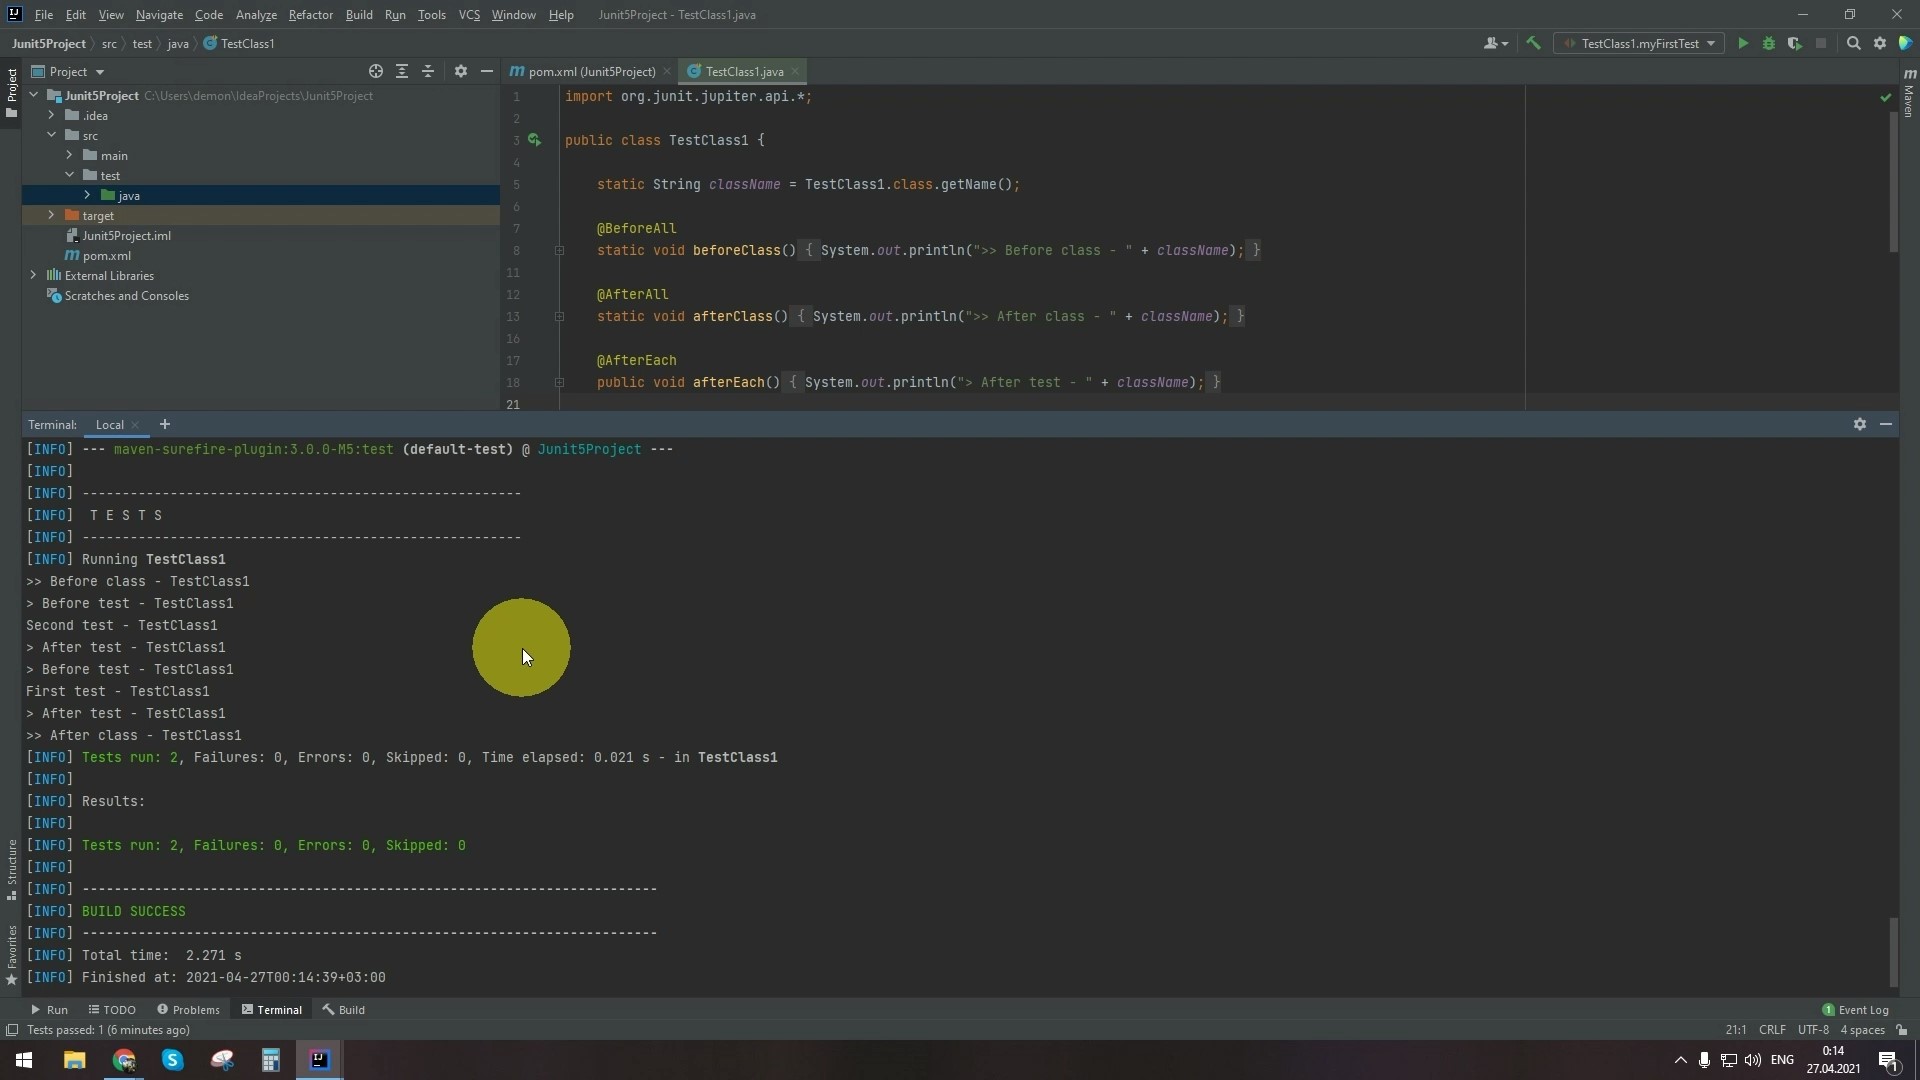
- Let’s run the tests using the terminal and the mvn clean test command.
- As you can see, the BeforeAll annotation method was run only once before the whole class. The AfterAll method was run once after the whole class. The BeforeEach and AfterEach methods were run before and after each test respectively.
- With these annotations, you can make the code lighter and more flexible.
- However, there are other ways to use annotations.
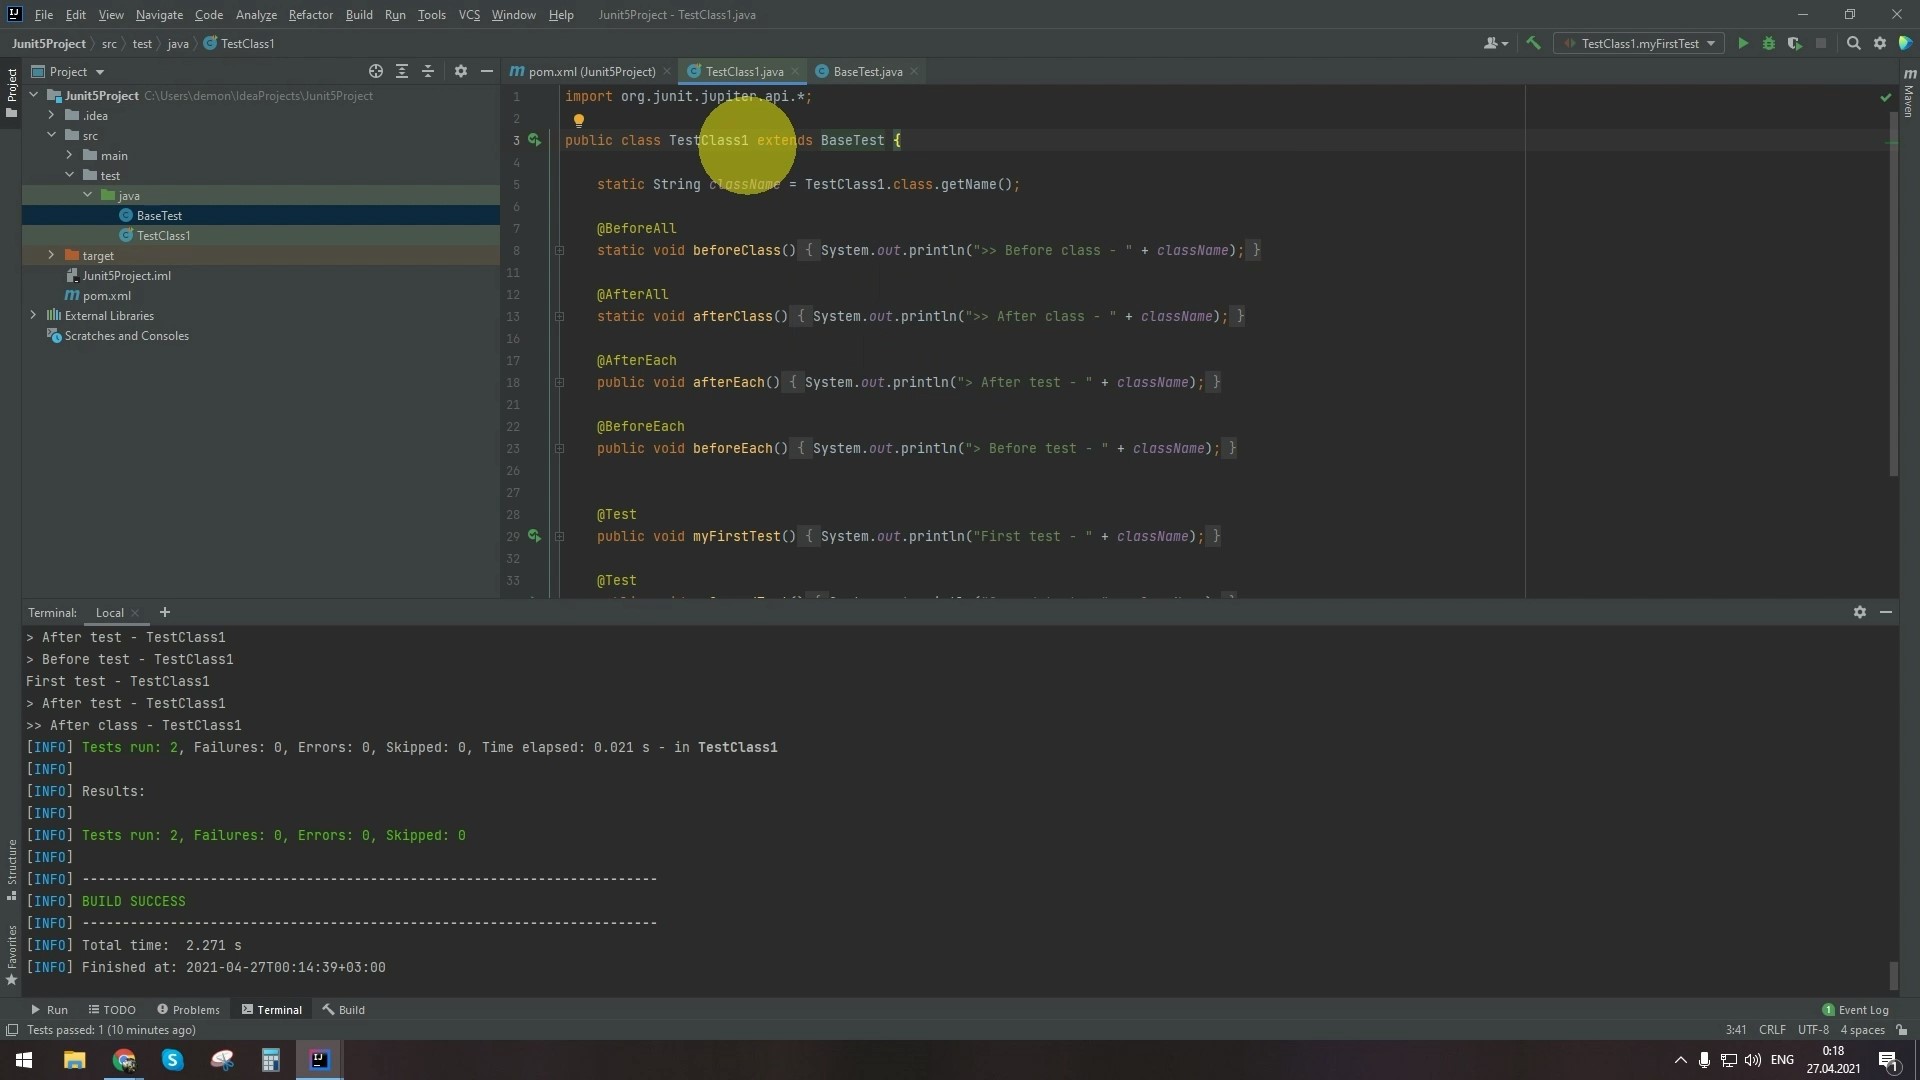
- Let’s create a new class next to the previous one and name it BaseTest.
- Open it and add methods with annotations BeforeAll, AfterAll, BeforeEach, and AfterEach. The names of these methods should differ from those used in the test class. Make sure to add output information to visualize your actions.
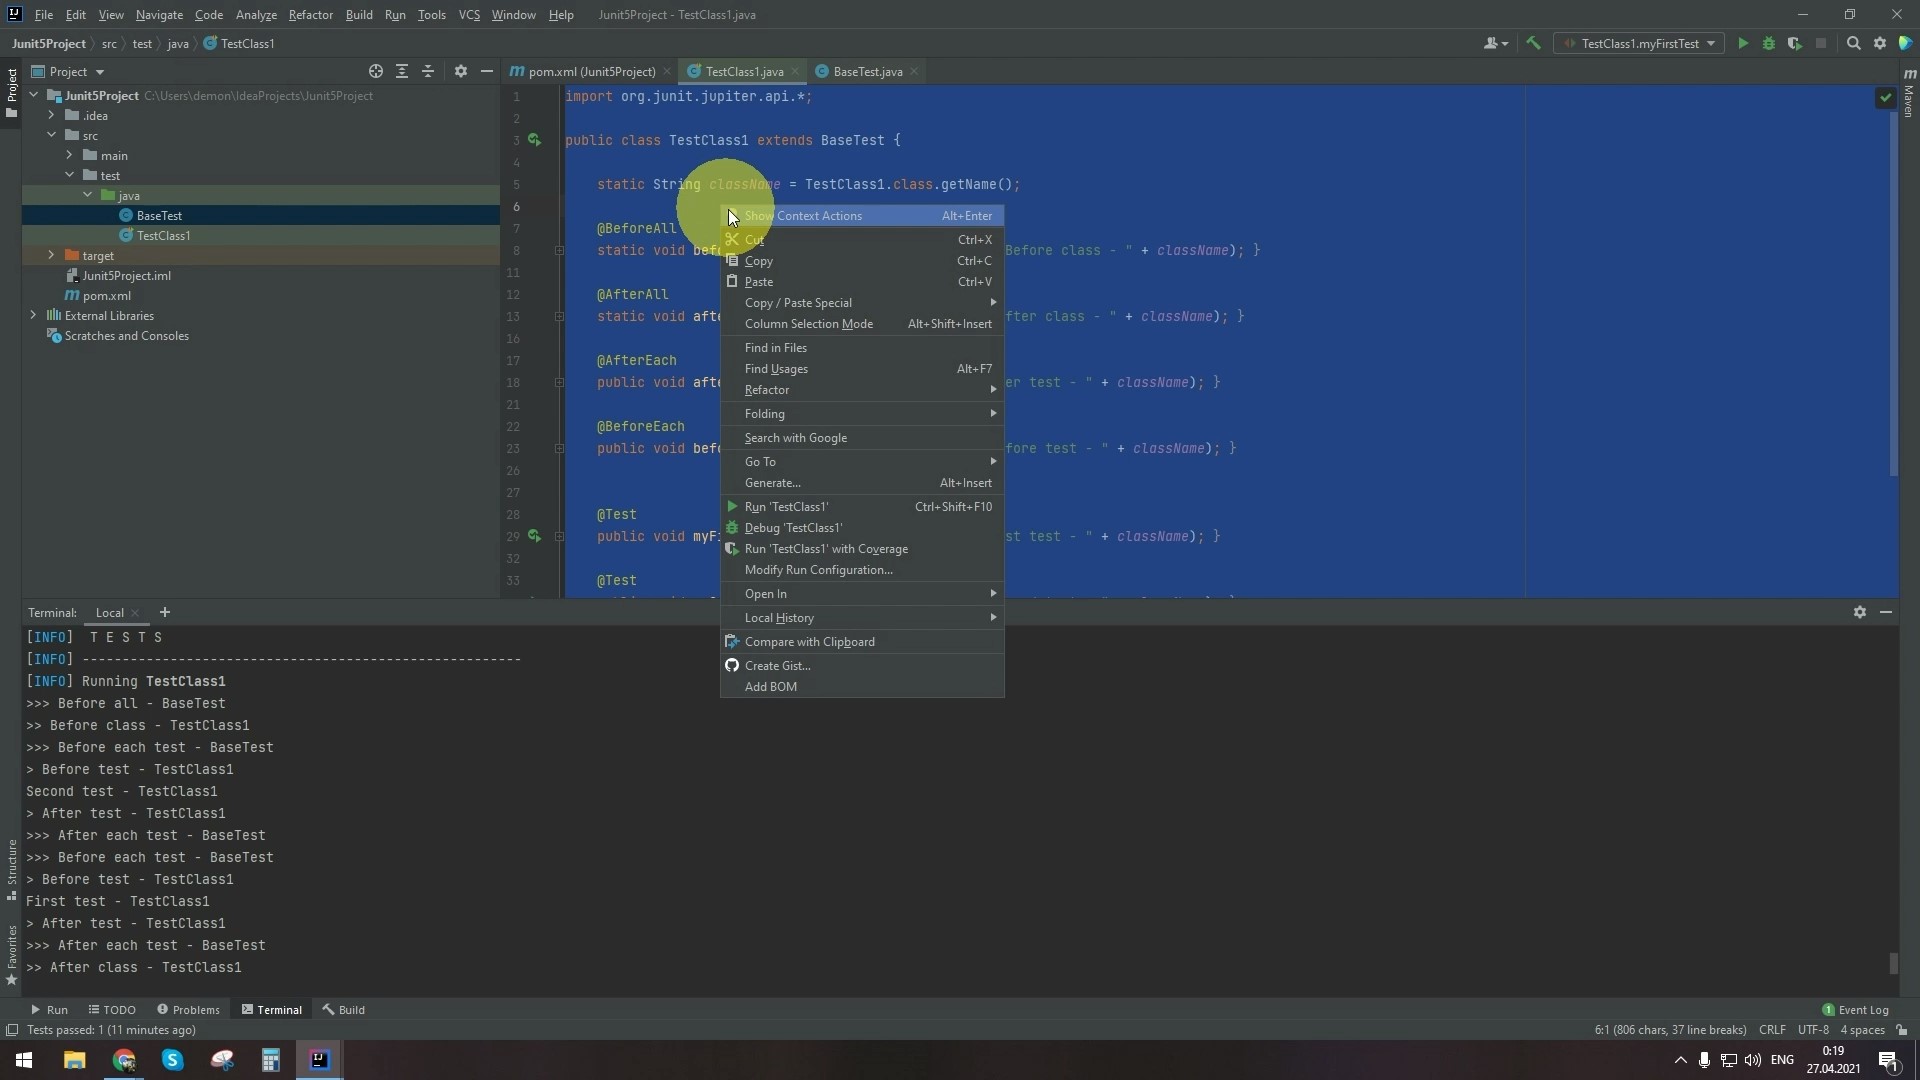
- Go to the test class and start under the BaseTest class.
- Go to the terminal and run the tests.
- As you can see, the BaseTest class methods work the same way that similar methods from the tests class do, though are started before and after the same methods of a test class. BaseTest methods are on a level above, representing a kind of wrapper over each class that is inherited from it.
- This is how you can make your tests more flexible.
- But even that’s not all. What if we have over a hundred tests and want to reduce their execution time? To do this, we can run these tests in parallel.
- For starters, let’s create a new test class that will be a copy of the previous one.
- First, let’s see how the two test files will run independently, not in parallel.
- Go to the terminal and run the tests.
- As you can see, the test files are run in turn.
- And now, let’s set up the parallel.
- Go to the pom.xml file. Add a block with the
tag to your maven-surefire-plugin. - Add the tags
with the value all in it, with value 2, and <reuseForks> with value false.
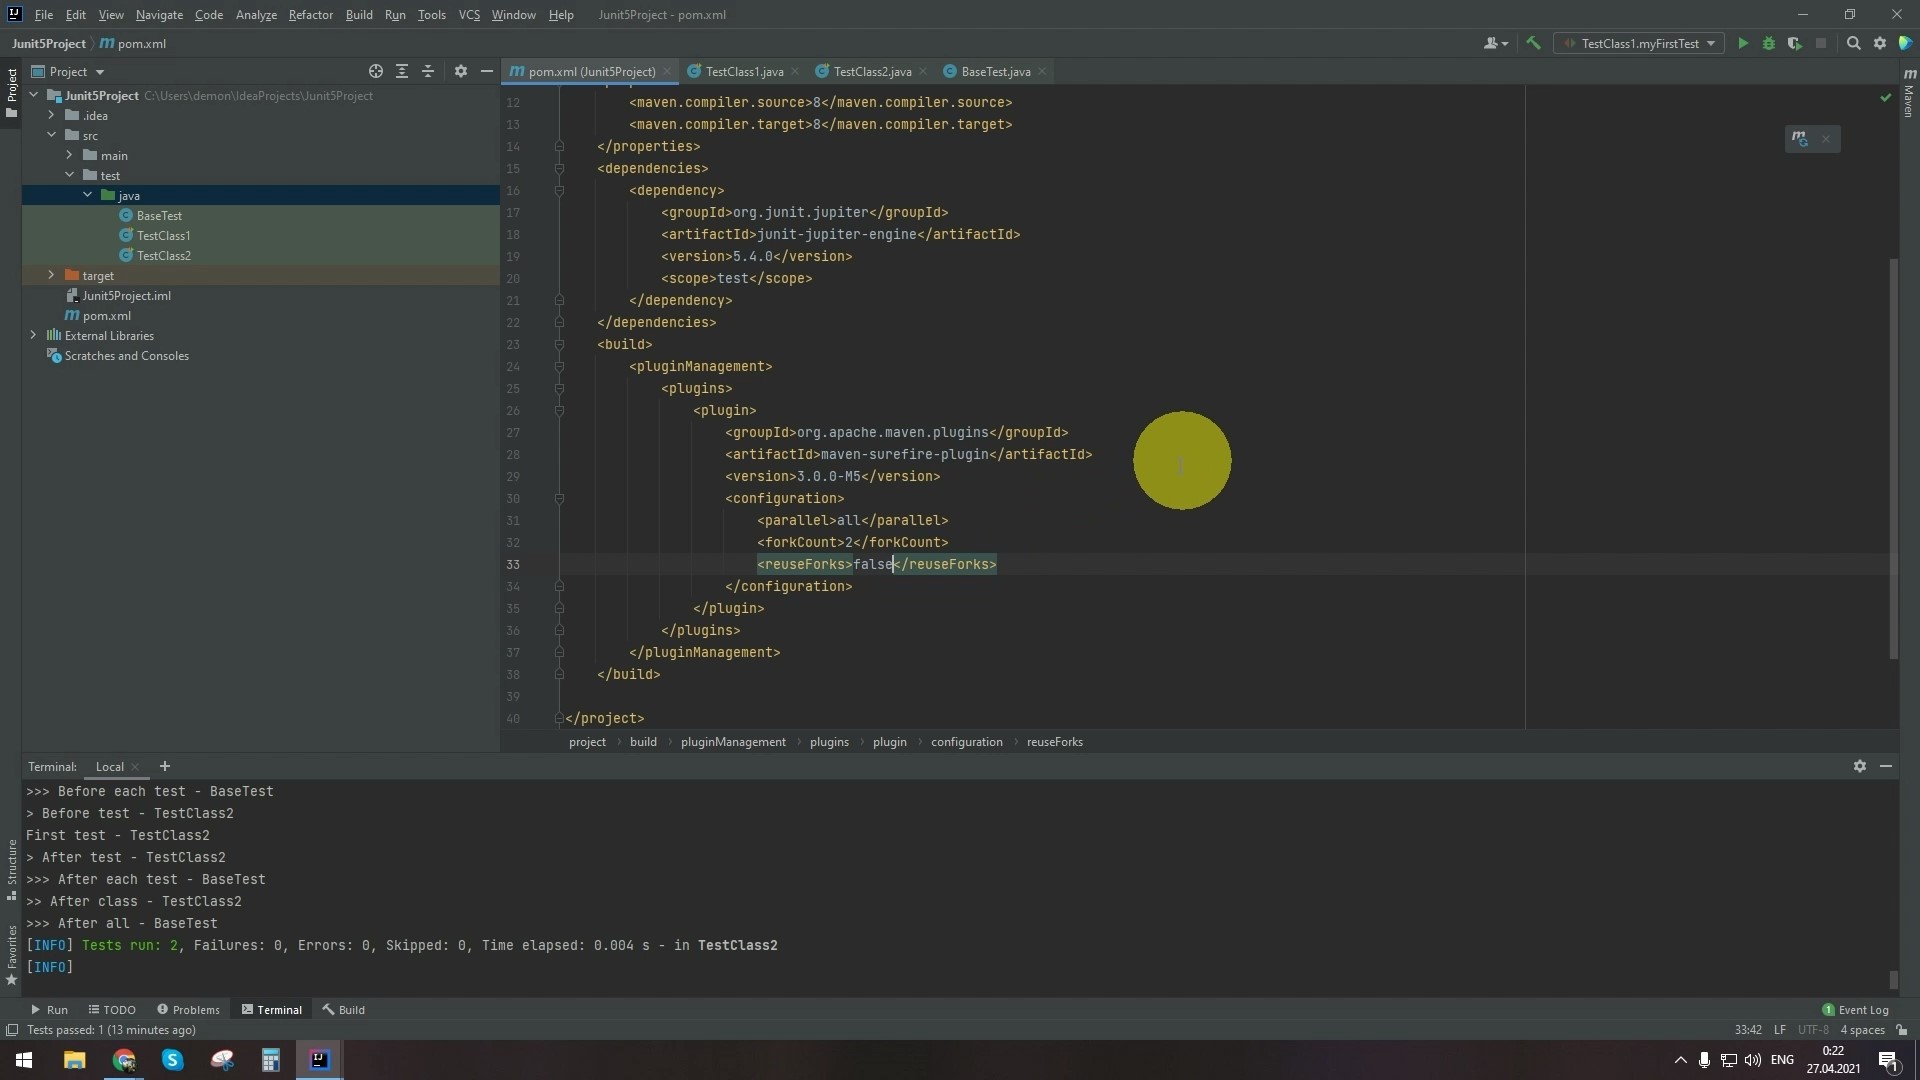
- You can find some additional configuration options on Maven’s website. The link is in the description.
- Upload the changes.
- Go to the terminal and run the tests again.
- Look at the result. Tests from different classes are mixed because they are performed at the same time.
This knowledge will help you write concise tests and perform them in the shortest possible time using the JUnit5 framework.
The link to the repository used in this lesson.
